Smart Flood Light
Introduction
Overview
Beautifully and intelligently designed, the Atomi Smart Flood Light is easy to install and can be controlled remotely from your phone. It’s more than a traditional flood light. In addition to the main LED light, it has a tunable White/RGB mood-light band that can be tuned to over 16 million different colors.
Before you begin
1. Know your Wi-Fi network and password
2. Make sure your mobile device is running iOS® 8 or higher or Android™ 4.1× or higher
3. Make sure you’re connected to a 2.4GHz Wi-Fi network (Atomi Smart can’t connect to 5GHz networks).
Installation
Step 1: Turn off the circuit breaker
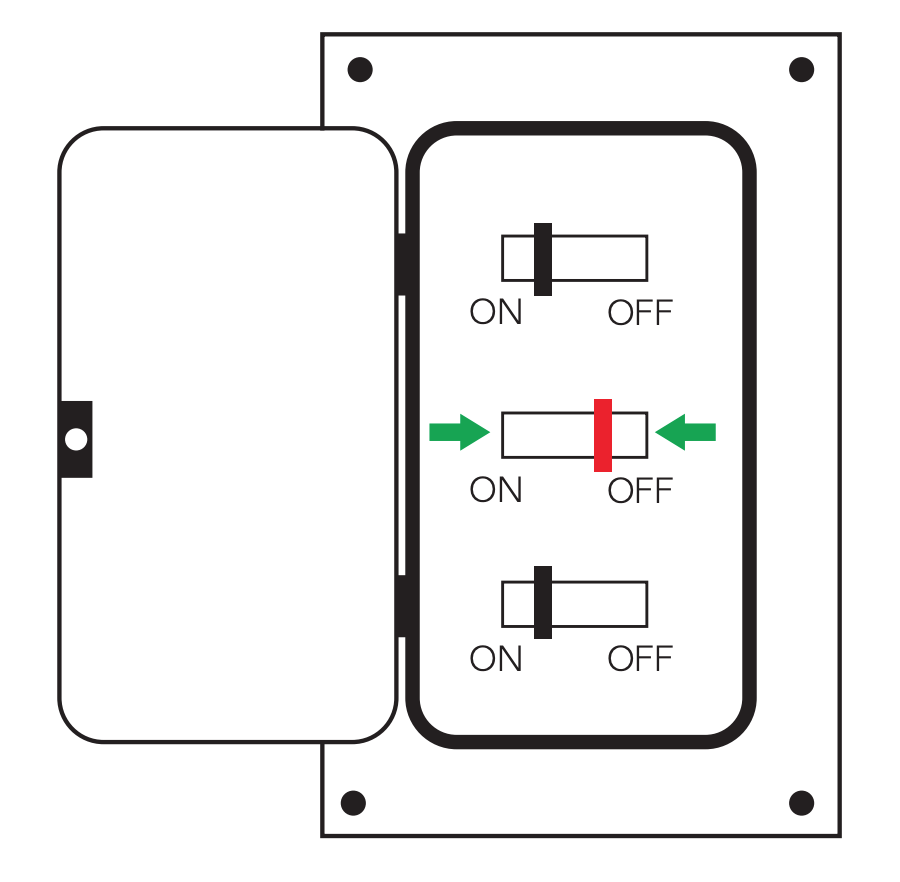
Find your light’s control in your circuit breaker and turn it off. Then make sure the power is off by flipping your switch a few times.
Step 2: Unscrew the mounting bracket from the Flood Light using the included allen key

Step 3: Remove the mounting bracket from the Flood Light

Step 4: Align and install the mounting bracket to your existing junction box

Step 4: Connect the corresponding wires using the wire nuts

Step 5: Install the Flood Light to the mounting bracket

Step 6: Apply sealant to the sides and top of the light fixture to the wall.
*DO NOT seal the bottom side of the backplate to allow moisture to drain

Step 7: Turn on your switch’s power from the circuit breaker and confirm that the Flood Light powers on (Solid white or flashing)

Connecting Your Device
Step 1: Download App
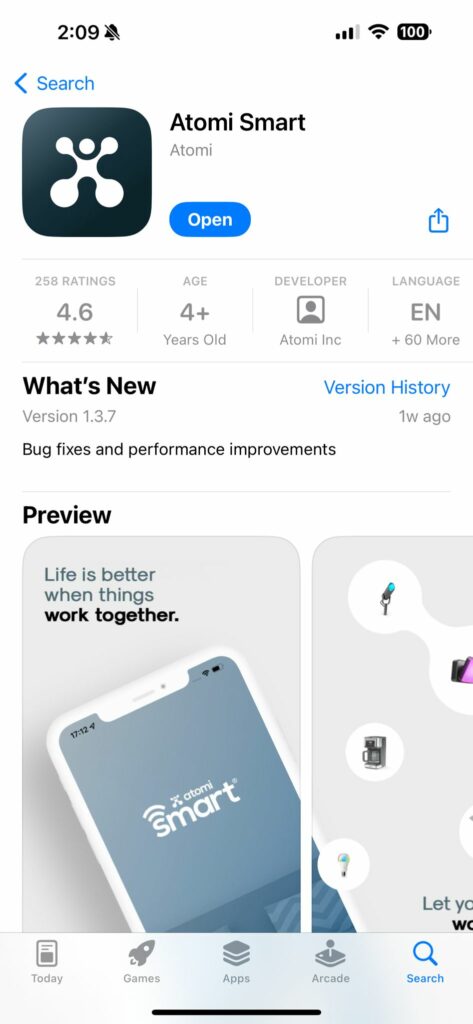
Download the Atomi Smart app from the App Store or Google Play and create an account. If you already have the app installed, please make sure to check for any updates as they will improve your experience with the Atomi Smart app.
Step 2: Adding Your Device

1. Confirm that the Floodlight is flashing white. If not, press and hold the ‘Power’ button located at the back of the light.
2. Once it’s flashing, open the Atomi Smart app and select “Add Device” or click (+) at the top right corner of the screen.
3. Press ‘Connect device’ on the banner that appears. If the popup does not appear, select the device from the list (Add Manually)
4. Follow the on-screen instructions
Step 3: Connecting to Wi-Fi

1. Enter your home Wi-Fi network (2.4 GHz only) and password
2. Press ‘Continue’ to complete the connection
Controlling your Smart Floodlight
Power

ON/OFF – Press ‘Power’ to turn ON/OFF your Smart Floodlight
White Mode

Brightness – Change your Smart Floodlight intensity
Color Mode
Color Wheel – Broad spectrum of colors to create the perfect ambiance.
Color Swatches – Add swatches to quickly access your favorite colors. Press and hold on a color to edit/remove your saved color
Slider 1 – Increase or decrease light brightness
Slider 2 – Change color saturation
Power-on behavior (Do Not Disturb)

Disabled: Light will always turn ON after a power outage (or when you turn ON your physical light switch)
Enabled: If the light status was OFF (in the app), it will remain OFF after a power outage (or when you turn ON your physical light switch)
In order to turn it on again using your physical light switch, follow the steps below:
– Start with the light switch OFF and wait a few seconds
– Turn ON and wait 2 seconds
– Turn OFF and wait 2 seconds
– Turn ON
Scenes

Select curated color scenes based on your mood.
Animated Scene Presets
Soft – Fades in and out between 2 colors
Colorful – Cycles between preset colors (Slow)
Dazzling – Cycles between preset colors (Fast)
Gorgeous – Fades between preset colors
* You can also edit any of the available scenes by pressing the ‘Edit/Sync light’ button.
Scheduling

Time – Select the time to run the schedule
Repeat – Select what days of the week to repeat the schedule
Note – Adds a note/label to the schedule
Power – Select to turn ON or OFF the light
Hint: Create a group to schedule all of your Floodlights to turn On/Off together. Learn more on the ‘Creating Groups’ section
More information about Creating Schedules is available here
You can also use smart automations to create advanced schedules. Click here to learn more.
Setting automations for Sunset/Sunrise
You can also create automations to turn on/off your lights based on your location’s sunset/sunrise time. This can be achieved using any of the 3 methods below:
Method 1: Scheduling via the Atomi Smart app
1. Go to the Atomi Smart app home screen and press ‘Smart Scenes’
2. Select ‘Automation’ and press the ‘+’ button
3. Press ‘Climate’ and select ‘Sunset/Sunrise’
4. Enter your City and select ‘Sunset’. Here you can add an offset to your automation (Example: turn on lights 10 minutes before sunset)
5. Press ‘Continue’
6. Press ‘Execute Device Action’ and select your smart floodlight device or group (learn more about creating groups on the next section of this page or visit our Creating groups page)
7. Select ‘Power’ and choose your action (On or Off). You can also set the brightness and color temperature.
8. Press ‘Continue’. Review your Automation details and press ‘Save’.
For more Trigger & Automation instructions, visit our Trigger & Automations page
Method 2: Scheduling via the Alexa app
1. Open the Alexa app
2. Select ‘More’ and press ‘Routines’
3. Press the ‘+’ button
4. Enter a name for your routine and select ‘When this happens’
5. Press ‘Schedule’ and select Sunrise or Sunset
6. Enter your Location, Time Offset and days of the week to repeat. Press ‘Next’
7. Press ‘Add action’ and select ‘Smart Home’
8. Select your smart floodlight device or group
9. Press ‘Power’ and set it to turn on or off based on your goal. Press ‘Next’ and ‘Save’
Method 3: Scheduling via the Google Home app
1. Open the Google Home app
2. Select ‘Routines’
3. Press the ‘+’ button
4. Select ‘+ Add starter’, press ‘Sunrise/sunset’ and select between Sunrise or Sunset
5. Enter your Location, Time Offset and days of the week to repeat. Press ‘Done’
6. Press ‘+ Add action’ and select ‘Adjust Home devices’
7. Click on the arrow next to ‘Adjust lights, plugs, and more’
8. Set the desired action for your devices (Example: turn on Floodlights) and press ‘Done’
9. Confirm that the checkbox for ‘Adjust lights, plugs, and more’ is checked. Press ‘Done’
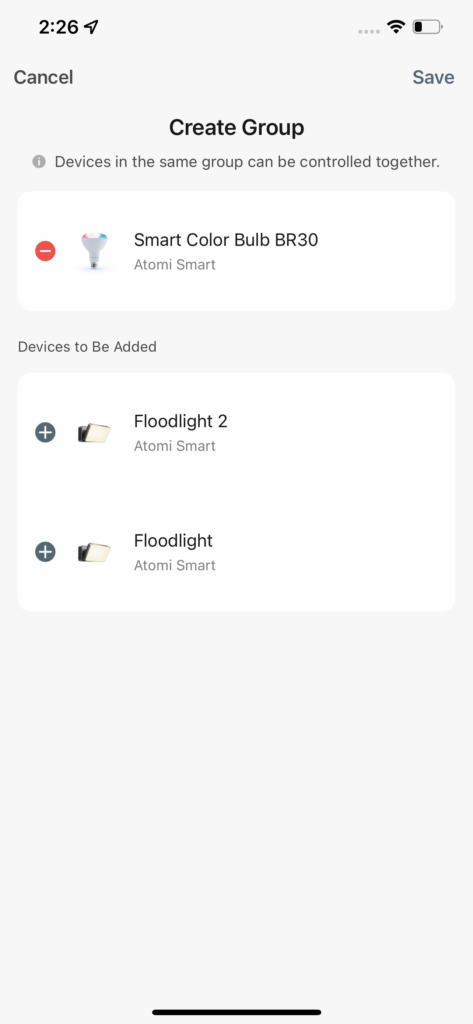
Creating Groups to control multiple lights together
The Atomi Smart app lets you group devices to control multiple floodlights simultaneously.
1. Make sure that all of your Smart Floodlights are online and powered ON
2. Press the ‘Edit’ button (Pencil Icon) at the top right corner of one of the Smart Floodlights’ app screen.
3. Press ‘Create Group’ and select the devices you wish to be included. Press ‘Save’. You can now control your lights simultaneously.
FAQ & Troubleshooting
Alexa
“Alexa, turn on [device name]”
“Alexa, turn off [device name]”
“Alexa, change [device name] to blue”
“Alexa, change [device name] to 50%”
Google Assistant
“Hey Google, turn on [device name]”
“Hey Google, turn off [device name]”
“Hey Google, change [device name] to blue”
“Hey Google, change [device name] to 50%”
In order to connect multiple lights and control with the Atomi Smart app you are required to create a group.
– On the Atomi Smart app, select one of the lights that you’ve added
– Press the top right button (Pencil icon)
– Press “Create Group” and select all the lights you want to group
– Press “Save”. You can now control all your Smart Floodlights simultaneously!
This function allows you to choose the light behavior after a power outage.
Disabled: Light will always turn ON after a power outage (or when you turn the physical light switch off/on)
Enabled: If the light status was OFF (in the app), it will remain OFF after a power outage. In order to turn it on again using your physical light switch, turn OFF/ON 2 consecutive times
In order to successfully connect Atomi Smart devices, a 2.4GHz connection is required.
The 2.4GHz frequency waves travel further than the 5GHz. This means that if your device is in another room or far from your phone, you will have a better signal reception (compared to 5Ghz) which is essential for your smart device to function correctly and stay online.
All modern routers come with 2.4GHz and 5GHz. Depending on your router type, these bands may appear as separate WiFi networks (Example: Name-2.4GHz and Name-5GHz) or combined. If you only have one WiFi network, you should still be able to connect since the Atomi Smart app automatically finds the 2.4GHz frequency when connecting to your router.
However, if you experience any issues, please follow the points below:
– Make sure that you are connecting to a 2.4GHz network
– Keep your mobile device close to the router during connection
– If you have two SSID for your WiFi (Example: Name-2.4GHz / Name-5GHz), please temporarily disable “Auto-Join” on your Name-5GHz network)
– If you have two SSID for your WiFi, make sure that your 2.4GHz and 5GHz WiFi have different names
– If your router gives the option to disable the 5GHz network, please disable it temporarily
– Disable any VPN apps/services in order to connect successfully
– If you are having issues to connect, turn on Airplane Mode (Keep only WiFi activated when connecting your smart device)
– Make sure that you’ve entered the correct password for your 2.4GHz WiFi on the “Select 2.4GHz Wi-Fi Network” screen (Case sensitive, and make sure that there are no extra spaces)
– If you have too many devices connected to your 2.4GHz (more than 10), please turn off some of them temporarily and retry connecting your smart device to the app
– If you have a Mesh router, you may not be able to manually switch to a 2.4GHz frequency. Since this frequency travels further than the 5GHz, you can force your device to connect to it by moving your phone far from the router
– If you are still experiencing issues to connect, delete the app and reinstall it
– If the issue persists, restart your router
Use your smart phone to confirm that you have at least two Wi-Fi bars in the vicinity of your Atomi Smart device. If not, move your Atomi Smart device closer to your router. (The list will refresh every 10 seconds).
Make sure you entered the correct WiFi password during the WiFi setup. Check if there are problems with your internet connection. If the WiFi signal is too weak, reset your WiFi router and try again.
Refresh the device list.
Force quit and re-launch the Atomi Smart app.
Press and hold the ‘Power’ button on your Floodlight for 10 seconds. The light should start flashing white.
Still have questions?
Create a ticket on our Support page. Our team is available to help, Monday through Friday, 9am to 5pm (EST)